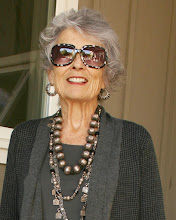
About Me

My photo
Los Olivos, California, United States
You can reach me at fool4fabric (at) gmail (dot) com

Sunday, June 30, 2013

110 degrees in the shade!!!

I'm in that part of the western United States that is SUFFERING from a big
heat wave...My day has been 30 minutes in the studio, with 3 fans on me, then 10 minutes here

See?
.

Then back to the studio, wash, rinse and repeat, etc....

I am ready to start my MOB jacket, but am waiting on interfacing from 
Fashion Sewing Supply...Pam is the BEST...super products and the very best customer service.

I finally got the time to watch my latest Craftsy workshop, "The Ultimate Tee
Shirt" by Marcy and Katherine Tilton. This is one I can whole-heartedly recommend. It's basic, yet I learned a whole lot from it. It's so interesting to 
discover how many little "tricks" there are that I haven't known about before. I totally enjoyed watching the dynamic between Marcy and Katherine...and seeing how there are MANY ways to accomplish various tasks. If you haven't signed up for this, do it now!

While waiting for the interfacing for MOB, I made a little Sandra Betzina jacket, 
V7281 (OOP) out of a black and white polka dot cotton. Can't remember where I got the fabric...it's a lovely weight, little bit of stretch. I hope I never get too old to love polka dots!


I made "stacked" buttons to go on this, as I couldn't find just the right thing.
My Canon SLR camera is misbehaving (gasp) so I didn't get many pictures on me...

I like the little top...it's quite fitted.


I've started participating in Visible Monday, a weekly celebration started by Patti, on her blog, Not Dead Yet Style...

"Visible Monday started in July 2011 as a way to celebrate our diverse beauty and love of style. (Here’s where I first wrote about it.) I came up with the idea of a "Visible Day" for us bloggers, in which we post an outfit, accessory, lipstick color, hairstyle, etc., that expresses our Joy of Being (Physically) Visible. 

Whoever wants to can join in, any given Monday. Just compose a post that includes any outfit, accessory, piece of jewelry, hairstyle, cosmetic or other adornment that makes you feel more confident, alive and visible that day. No restrictions, just share your beauty."


Come visit and see all the beautiful women...and join in, if you like!

TTYL


Thursday, June 20, 2013

TKO #2...and a Renovation

As long as I was knocking things off, I made these white linen pants, using my 
custom Lynda Maynard pattern, a mid-weight linen from Fabric.com, and some
black and white braid I found last time I was in Portland.


The top is  another V8089 in a linen blend from EOS which Linda called 
"sharkfin". It's got a little bit of stretch and I think it must have some rayon in it, as it's quite drapey. Love the fabric!


Of course, I can wear both my wrap belts with it...


The renovation revolved around a jacket I made 3 years and 50 pounds ago...in those days I wore much looser clothing and my friend Shams  hadn't
yet taught me to take pictures of myself...


I used my then TNT jacket pattern, Cutting Line Designs Anything But Ordinary


       BAGGY!

This is how I photographed my travel wardrobes in 2010...


The fabric is a fabulous, unusual one from Marcy Tilton...I've never seen another one like it. 


I think it is Japanese; it's a layer of thin black jersey with a very holey denim stitched to the top of it with circular stitching. The holes are "deconstructed" and
therefore very ravelly (it's a bear to sew!). On top of this are large zen-type
circles painted in red, silver and ochre...looks hand painted. I finished it off with a fabulously sparkly red Riri zipper...

It's the only piece of clothing from my "larger" days that I couldn't bear to part with, so it's been hanging in my studio for a couple of years.

When an unusual desire to hem and re-do hit me last week, I tackled the jacket. I had hoped to recut it with princess seams, but there just wasn't enough fabric in the front to do that. (There was plenty in the back, however!)
So, I took it apart, recut it, added front and back vertical darts, shaped the side seams and restyled the sleeves.


The pants are  M6405blogged about here, and the shell is CLD Pure and Simple OOP.

I'm very pleased...I can't wait for fall to wear this again!

DD, the Bride2B, was here with fiancé and her "handlers" (just kidding...the woman coordinating all things wedding is a dear friend and the one who spearheaded cleaning my studio a couple of years ago). We've got lots to do to get the property pretty'd up, and I have a couple of MOB potential patterns to get going on; I can foresee busy-ness!

TTYL


Thursday, June 13, 2013

ODDS & ENDS

This is a catch up post...I was able to fix the pretty red suede obi belt I posted
about last week...
I glued purse interfacing to the back of the belt with leather/suede glue; I hope it lasts for a while!


and that gives me a chance to wear my new favorite summer sandals:

Pretty, aren't they!

While I'm waiting for a vintage pattern to arrive, to muslin my MOB jacket, I've sewn a few little pieces:


This vintage Butterick 3250 tie-in-front blouse, made in a cranberry and white Ikat from F&S Fabrics in Los Angeles. I think the pattern is from the 60's...sort of a fun "do you remember"...

and then I tried out V1355, Sandra Betzina's recent "harem pants"...


I made them from a very drapey rayon I got at Planet Fabric in Venice (Los Angeles) Fun for a summer night...

Off to the Post Office to see if my pattern has come!

TTYL

Thursday, June 6, 2013

TKO

Thank you so much for all the lovely responses to my "Gratitude" post of yesterday...never have I been so aware of that interNET out there of caring friends...

And the TKO of this post? (BTW, TKO in this sense means Technical Knock OFF)

Remember this ?

Well, here's MY version...


minus, for the time being, the lovely red suede obi belt...I actually bought that, but after wearing it on Sunday, I realized it needs to be interfaced so that it doesn't collapse into a narrow crumpled line after 5 minutes' wearing...

I was aided in copying this by the "unstyled" photo

which looked like V8089, an OOP Sandra Betzina pattern:


I'm wearing it here with my first pair of Lynda Maynard pants and a beautiful handmade belt I've had for years.


TTYL...


Wednesday, June 5, 2013

Gratitude...

I wake up every day in gratitude for what I have been given, the lessons that life has taught me, and the family and friends I love, and who love me, and the gifts of passion and curiosity which make my life an exciting one.

Yesterday was my 73rd birthday; although I am not a superstitious person, I have lately experienced a few moments of anxiety...my mother died on her 73rd birthday and my sister died a few weeks before she would have turned 73. So I was particularly grateful to wake up this morning!


Friday, May 31, 2013

A Sewing Meet-Up!

Although it would seem that 99.9% of the blogger/sewist meet-ups take place in the San Francisco Bay Area, there was actually one today, 300 miles south, in the beautiful Santa Ynez Valley in Santa Barbara County...
This is Robyn W., who I met IRL today for the first time. She identified herself recently in a comment on one of my posts and we wasted no time in getting together for a cup of coffee and a non-stop chat about all things sewing.                   
Actually, it was NOT non-stop...Robyn waited graciously while Shams and I did
several over-the-phone remote fabric shopping events, like this one, only Shams was at Fabrix in San Francisco this time, relaying in words and pictures some fabulous not-to-be-missed items. Normally, when I am with a friend, I don't take phone calls or texts, but Shams had limited time and the fabrics wouldn't be there very long, so I broke my rule and multi-tasked. I can't wait to see what she bought for me!

Thursday, May 30, 2013

Pocket Tutorial

Enough people have asked me how I do my pockets on travel vests and jackets to warrant a tutorial...I've never done one before, so be kind!!!

I'm showing you two jackets and two vests that I've put pockets into...


and my recent red vest...

You'll see how I learned from each garment, how to improve the next one!

The first thing to do is to determine what YOU are going to use the pockets for.
What one person needs a pocket for is not necessarily universal. For instance, I travel often, so I need:

  •  an easy-to-reach pocket for my airline boarding pass and my passport; for security, I put this on the inside of my left  side, as I am right-handed and need to be able to easily reach this pocket.
  • a place for a small package of tissues and a lipstick.
  • a secure place for my glasses/sunglasses.
  • a secure place for money and ID, if I'm not carrying a passport.
  • a small water bottle.
  • a pocket for my point and shoot camera, ready to aim!
The rest of the pockets are for various things, depending on what I'm doing.

                               Choosing/Adapting a Pattern

If the vest or jacket pattern you're using doesn't include a lining, you'll need
to draft one. Do not use facing patterns...or you'll wind up like this, unable to access your pockets!

It's a good idea to cut a size larger than you normally would, to allow room for inner pockets to expand when full.

If either the lining or the fashion fabric you're using is lightweight, you may need to interface the back side so the pockets won't sag. I didn't do that on this jacket


and should have. I can't put much of anything in these pockets without the jacket shifting out of shape. It's also more flattering to put the inside pockets up higher and down lower (unless you need extra inches in the waist area!)

On my second try, the fashion fabric (denim) was a little heavier and more stable, so I didn't need to interface the pockets on the front. The lining, however, was a vintage rayon crepe, so it needed the reinforcement of interfacing.


Another thing to take into consideration is if there are belts or waist casings on the pattern.

On my silver vest, I made the pattern pretty much as is, and wound up  sacrificing some of my pocket depth to the waist casing, marked above with the dots. I went back in later and added a few hanging pockets to get the depth I needed (but it wasn't very pretty...)
I also made the pockets according to the pattern, and found they weren't deep enough; every time I bent over, things would fall out of the pockets, especially because both fabrics are slippery.